
Suzuki Baleno Cabin Air Filter Replacement Guide|Step‑by‑Step Instructions
If you drive a Suzuki Baleno, replacing the cabin air filter is one of the easiest DIY maintenance tasks you can perform.
Suzuki has been expanding its compact car lineup in recent years, with the Baleno—produced in India—gaining strong popularity in global markets. The model even introduced a turbocharged variant in 2016, offering impressive performance for its class.
In this guide, you’ll learn how to replace the Suzuki Baleno cabin air filter quickly and safely, even if you’re a beginner.
Remove the Glove Box
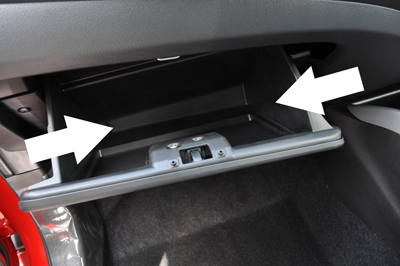
To access the cabin filter, start by opening the glove box.
Press both sides of the glove box inward while gently pulling it toward you.
This releases the hooks and allows the glove box to come off.
If it feels stuck, press the inner left side section by section to free the latch more easily.
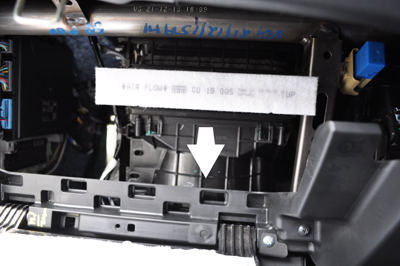
Remove the Cabin Filter Cover

Once the glove box is removed, the cabin filter cover will be visible.
The cover uses simple pinch‑style clips—similar to a clothespin—so you can remove it by pinching the tabs and pulling it toward you.
You may notice various markings on the cover, which is typical for the India‑built Baleno.
Replace the Cabin Air Filter
Slide out the old filter and insert a new one.
Suzuki has standardized this replacement method across many of its models, making the process extremely simple and beginner‑friendly.
Because cabin filters affect air quality and A/C performance, many dealers recommend replacing them regularly. If you haven’t changed yours recently, now is a great time to consider it.
SUZUKI BALENO Cabin Air Filter
✅ Compatibility Confirmed
OEM No: 9585068P00, 9900079AJ8, Baleno(WB32S/WB42S)
Ready to buy? Check the price for your searched part on eBay.
Find "9585068P00" on eBay*As an eBay Partner, I may earn from qualifying purchases.


Comments